News & Events
Best Practices for Pipetting in Immunoprecipitation and Beyond
Sep
You play a key role in the success of your experiments. Accurate measurements start with proper pipetting technique. Pipettes help you deliver the right amount of liquid every time. Even a small mistake can change your results or cause contamination. > Good habits in the lab protect your samples and your data. Take a moment to think about how you use pipettes each day and look for ways to improve.
Key Takeaways
- Choose the right pipette for your task. Micropipettes work for small volumes, while serological pipettes handle larger amounts. This choice helps ensure accurate results.
- Always use a new pipette tip for each sample. This prevents cross-contamination and keeps your results reliable.
- Calibrate your pipettes regularly, ideally every three to six months. This practice helps maintain accuracy and prevents errors in your experiments.
- Use filter tips when working with sensitive samples. These tips help avoid contamination and protect your results.
- Practice good pipetting techniques, like aspirating slowly and holding the pipette at the right angle. This improves accuracy and protects your samples.
Types of Pipettes in the Laboratory
You use many types of pipettes in your daily work. Each pipette helps you handle liquids with accuracy. Knowing the differences between pipettes lets you choose the best tool for your experiment.
Micropipettes
Micropipettes give you control over small volumes. You often use them for DNA, RNA, or protein samples. You can select from different types of micropipettes, such as single-channel or adjustable-volume models. Applications of micropipettes include PCR setup, enzyme assays, and immunoprecipitation. You need precise measurements for these tasks. Micropipettes help you avoid errors and keep your results reliable.
Volumetric Pipettes
Volumetric pipettes measure one fixed volume. You use them when you need high accuracy for solutions. These pipettes work well for preparing standards or dilutions. You see them in chemistry labs and quality control. Volumetric pipettes help you make sure your solutions have the right concentration.
Serological Pipettes
Serological pipettes handle larger volumes. You use them for cell culture, media transfers, or reagent mixing. These pipettes come in sizes from 1 ml to 25 ml. Many laboratories use 1-2 ml pipettes most often, with over 40% market share. You see 5 ml pipettes in about 25% of cases, and 10 ml pipettes in more than 20%. You use 25 ml pipettes for big transfers, mostly in pharmaceutical work.
| Pipette Type | Market Share | Common Applications |
|---|---|---|
| 1-2 ml | > 40% | Precision-based applications in molecular biology and pharmaceutical research |
| 5 ml | ~ 25% | Mid-range liquid handling in microbiology and cell culture experiments |
| 10 ml | > 20% | High-volume liquid handling in biotechnology, cell culture, and drug discovery |
| 25 ml | ~ 10% | Large-volume transfers in industrial applications, primarily in pharmaceuticals |
Multichannel Pipettes
Multichannel pipettes let you fill many wells at once. You use them for plate-based assays, ELISA, or high-throughput screening. These pipettes save you time and reduce errors. You can process samples faster and keep your workflow efficient.
Tip: Choosing the right pipette for your application helps you get accurate results and avoid mistakes. You protect your samples and make your experiments more reliable.
You see that the types of pipettes match different tasks. You need to think about the volume, the sample, and the application. Picking the right pipette helps you succeed in immunoprecipitation and other laboratory work.
Pipette Selection and Tips
Volume Range
You need to match your pipette to the volume you want to measure. Small volumes require micropipettes. Large volumes need serological or volumetric pipettes. You see that choosing the right pipette helps you avoid mistakes and keeps your results accurate. For immunoprecipitation, you often work with volumes between 1 µl and 1000 µl. You select a pipette that covers this range. If you use a pipette outside its recommended range, you risk inaccurate measurements.
| Volume Range | Recommended Pipette Type | Common Application |
|---|---|---|
| 1–10 µl | Micropipette | PCR, antibody addition |
| 10–100 µl | Micropipette | Protein sample transfer |
| 100–1000 µl | Micropipette | Buffer addition, reagent mixing |
| 1–25 ml | Serological Pipette | Media transfer, cell culture |
Tip: Always check the manufacturer’s specifications for each pipette. You protect your samples by staying within the recommended volume range.
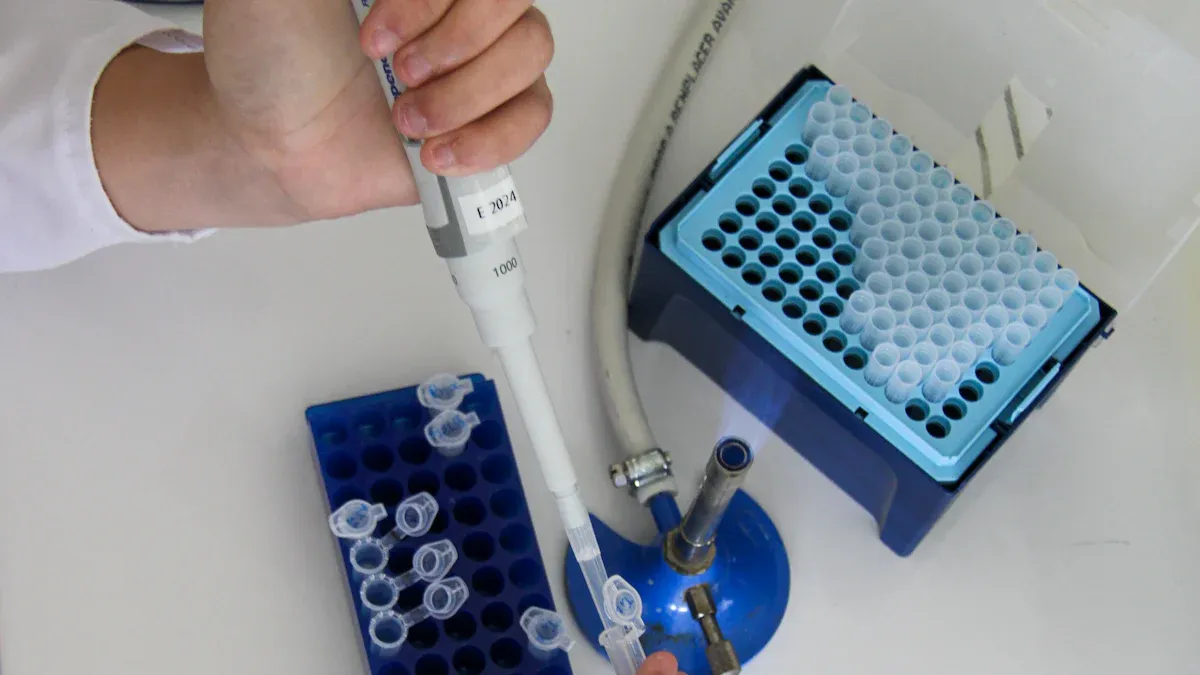
Pipette Tips
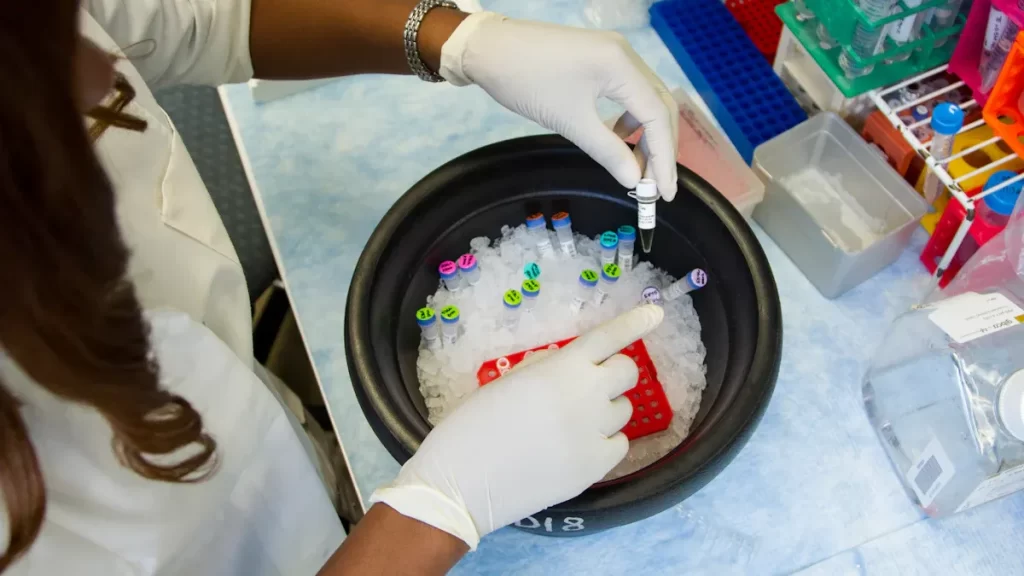
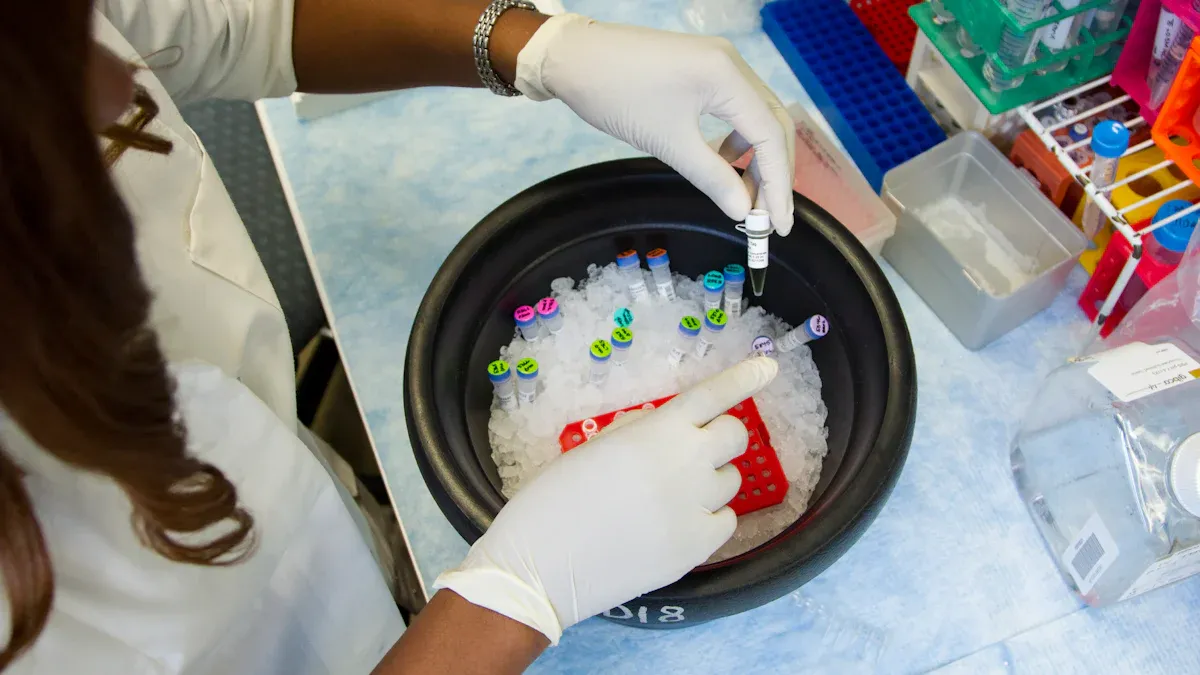
You need to select the right tip for your pipette and your application. Standard tips work for most tasks. Filter tips help you prevent contamination, especially when you handle sensitive samples like antibodies or proteins. You use low-retention tips for viscous liquids or when you want to recover as much sample as possible. You see that choosing the right pipette tip improves accuracy and protects your samples.
- Standard tips: Use these for general pipetting guidelines and routine tasks.
- Filter tips: Use these for immunoprecipitation, PCR, and when you want to avoid cross-contamination.
- Low-retention tips: Use these for protein and antibody work, where every drop counts.
Note: You should always use tips that fit your pipette model. Poorly fitting tips can cause leaks and lead to sample loss.
Compatibility with Immunoprecipitation
You need to make sure your pipette and tips work well with immunoprecipitation protocols. You often handle small volumes and sensitive reagents. You see that choosing the right pipette and tip helps you follow general pipetting guidelines and keeps your results reliable. You use filter tips to prevent contamination. You use low-retention tips to recover more protein or antibody. You avoid using old or damaged tips, which can cause sample loss.
- For antibody addition, use a micropipette with a filter tip.
- For protein transfer, use a micropipette with a low-retention tip.
- For buffer addition, use a micropipette with a standard tip.
Callout: You improve your workflow by choosing the right pipette and tip for each application. You follow general pipetting guidelines and protect your samples from contamination.
You see that choosing the right pipette and tip is key for immunoprecipitation and other laboratory applications. You match the pipette to your volume range. You select tips based on your sample type. You follow general pipetting guidelines to keep your results accurate and reproducible.
Immunoprecipitation Pipetting Techniques
You need strong pipetting skills for immunoprecipitation. Good technique helps you protect your antibody, keep your target protein safe, and improve the specificity and affinity of your results. You can use these methods for both individual protein immunoprecipitation and protein complex immunoprecipitation. You also need to understand how to use a micropipette and select the best micropipette for the lab. Careful pipetting supports your pull-down assay and helps you study protein-protein interactions.
Forward and Reverse Pipetting
You use forward pipetting for most immunoprecipitation steps. This method works well with air displacement pipettes and micropipettes. You press the plunger to the first stop, draw up your liquid, and then dispense it by pressing to the second stop. This gives you accurate volumes and helps you keep your antibody and target protein safe.
Reverse pipetting helps you handle viscous samples or small volumes. You press the plunger to the second stop, draw up your liquid, and then dispense by pressing to the first stop. This leaves a small amount in the tip, which you discard. You use reverse pipetting when you want to avoid bubbles or sample loss. This is important for antibody solutions and for samples with high affinity or specificity.
Tip: Always pre-wet your pipette tip before you start. Aspirate and dispense your liquid a few times to coat the inside of the tip. This step helps you get consistent volumes and reduces sample loss.
You should use pipetting instead of a vacuum to remove supernatant from pelleted beads during immunoprecipitation wash steps. This reduces the loss of beads and immunoprecipitated material. You protect your antibody and target protein by using gentle pipetting.
Antibody Handling
You must treat your antibody with care during immunoprecipitation. You want to keep its affinity and specificity high. You also want to avoid denaturation or loss. Follow these best practices:
- Store your antibody at 4°C for short-term use. For long-term storage, use -20°C or -80°C. Always follow the manufacturer’s instructions.
- Minimize freeze-thaw cycles. Use aliquots to avoid refreezing. This keeps your antibody active and protects its affinity.
- Mix your antibody gently. Use slow pipetting or gentle inversion. Avoid vigorous vortexing, which can damage your antibody and reduce specificity.
You need to use specific antibodies for your target protein. You can improve your results by using low-retention tips and air displacement pipettes. You also need to use a micropipette that matches your volume range. This helps you keep your antibody and target protein safe during immunoprecipitation.
Note: Always use a new tip for each antibody or target protein to prevent cross-contamination. This step protects your specificity and affinity.
Mixing and Homogenization
You need to mix your samples well during immunoprecipitation. Good mixing helps your antibody bind to the target protein. You can use gentle pipetting to mix your sample. Avoid harsh vortexing, which can break protein-protein interactions or damage your antibody.
- Use a micropipette to mix by aspirating and dispensing the sample slowly.
- Mix beads and antibody gently to keep the affinity and specificity high.
- For protein complex immunoprecipitation, use slow and even mixing to protect protein-protein interactions.
You can use air displacement pipettes for most mixing steps. You should avoid foam or bubbles, which can cause sample loss or reduce specificity.
Angle and Speed
You need to control the angle and speed of your pipetting. Hold your micropipette vertically when you aspirate. This helps you get the right volume and protects your antibody and target protein. When you dispense, touch the tip to the side of the tube. This helps you recover all your sample.
- Aspirate slowly to avoid bubbles and sample loss.
- Dispense smoothly to keep your antibody and target protein safe.
- Use a steady hand for all pipetting steps. This helps you keep high affinity and specificity.
You should use air displacement pipettes and the best micropipette for the lab. You can improve your immunoprecipitation results by following these steps. You protect your antibody, target protein, and protein-protein interactions.
Callout: Good pipetting technique helps you get the most from your immunoprecipitation. You keep your antibody active, protect your target protein, and improve your specificity and affinity.
Preventing Contamination in the Laboratory

You need to keep your samples safe from contamination. Good habits help you protect your results and avoid errors. You can follow these steps to make your work cleaner and more reliable.
Filter and Barrier Tips
Filter and barrier tips stop aerosols and liquids from entering your pipette. These tips help you keep your samples pure, especially during sensitive tasks like immunoprecipitation. Many protocols, such as the SimpleChIP® Plus Chromatin Immunoprecipitation Protocol, recommend filter-tip pipette tips to lower the risk of contamination.
| Protocol Name | Why Use Filter Tips? |
|---|---|
| SimpleChIP® Plus Chromatin Immunoprecipitation | Filter-tip pipette tips minimize risk of contamination |
| SimpleChIP® Chromatin Immunoprecipitation | Filter-tip pipette tips minimize risk of contamination |
You should use filter tips when you work with PCR, DNA, or protein samples. These tips also help when you want to avoid aerosol formation. You protect your pipette and your samples at the same time.
Changing Tips
You must change your pipette tip after every sample. This step is key for preventing cross-contamination. Even if samples look the same, you can still transfer tiny amounts of material. Always use sterile, certified tips that are free from DNA, RNA, and DNase/RNase.
- Change tips between every sample.
- Use a new tip for each reagent.
- Store tips in sealed boxes to keep them clean.
- Wear gloves and avoid touching the tips with your hands.
You also need to hold your pipette upright. This keeps liquid from entering the pipette body and causing problems.
Clean Workspace
A clean workspace helps you keep your samples safe. You should wipe down your bench and pipettes before and after work. Always wear gloves and use careful pipetting to avoid splashing. Try not to let the pipette tip touch the sides of containers. This simple step helps you avoid contamination transfer.
- Clean all surfaces before and after experiments.
- Use dedicated pipettes for each sample when possible.
- Tilt containers slightly to help liquid flow smoothly and avoid splashing.
Tip: Practicing aseptic technique is one of the best ways for preventing cross-contamination and keeping your results accurate. Small changes in your routine can make a big difference in your data quality.
Pipette Maintenance and Calibration
Calibration Schedule
You need to keep your pipettes accurate. Regular calibration helps you avoid errors in your experiments. Most labs check pipettes every three to six months. If you use pipettes often, you should check them more frequently. You can set up a formal calibration program and document each check. You can use gravimetric testing to verify accuracy between scheduled calibrations. Training helps you handle pipettes correctly and prevents calibration drift. You should work with accredited calibration services for compliance.
- Check pipettes every three to six months.
- Increase frequency if you use pipettes daily or for critical applications.
- Document each calibration in a logbook.
- Use in-house verification methods like gravimetric testing.
- Store pipettes in controlled conditions to maintain accuracy.
- Train everyone in proper pipette handling.
Calibrating your pipettes keeps your results reliable and your experiments successful.
Cleaning Procedures
You must clean your pipettes to remove protein residues, especially after immunoprecipitation. Do not use alcohol, because it causes proteins to set. Start by rinsing the contaminated parts with a detergent solution. Rinse thoroughly with distilled water. Let the pipettes air dry before you use them again.
- Rinse contaminated parts with a detergent solution.
- Rinse with distilled water.
- Allow pipettes to air dry.
You protect your samples and equipment by following these steps.
Storage and Handling
Proper storage prevents damage and contamination. Always store pipettes upright in a stand or rack. Keep them away from heat sources and direct sunlight. Do not rest pipette tips on surfaces. Avoid storing pipettes horizontally, because liquids can enter and cause contamination. Use pipette holders to keep them secure. Make sure your storage area is clean and dust-free.
- Store pipettes vertically in a stand or rack.
- Keep pipettes away from heat and sunlight.
- Avoid resting tips on benchtops.
- Use holders for secure storage.
- Maintain a clean, dust-free environment.
You keep your pipettes in good condition and ready for accurate work.
Troubleshooting Pipetting Errors
Inaccurate Volume
You may notice your results do not match expectations. Inaccurate volume delivery can cause this problem. You can detect errors by comparing the amount you pipette with a standard. You should check your pipette regularly. Training events, like the Pipetting Olympics, help you learn how to spot mistakes. You can improve your skills by practicing with different samples and measuring your performance.
- Use regular calibration to compare dispensed volumes against a standard.
- Watch for performance outside acceptable limits. This means your pipette may need service.
- Track how often your pipette fails. This helps you predict when it needs maintenance.
- Practice with training events to improve accuracy and reduce bias.
| Aspect | Description |
|---|---|
| Calibration Definition | Compare dispensed volumes against a standard to measure deviation. |
| Failure Identification | Performance outside acceptable limits is defined as failure. |
| Regular Calibration | Implement regular calibration programs to quickly identify failing pipettes. |
| Mean Time Before Failure | Predict how long a pipette maintains accuracy, calculated based on failure rates. |
| Factors Affecting MTBF | Usage frequency and type of samples can influence the MTBF of pipettes. |
| MTBF Calculation | Track failure times or use a mathematical formula to determine MTBF. |
Tip: You can improve accuracy by joining training sessions and checking your pipette often.
Leaks and Drips
Leaks and drips can ruin your experiment. You may see liquid dripping from the tip or notice the volume is less than expected. Poor tip fit or damaged seals often cause this issue. You should use high-quality tips that fit your pipette securely. Check the O-rings and seals often.
| Issue | Cause | Solution |
|---|---|---|
| Dripping or Leaking Tips | Poor tip fit or damaged seals | Use high-quality tips that fit securely and check O-rings regularly. |
Note: Replace tips if you see leaks. Inspect seals and O-rings for damage.
Viscous Samples
Thick liquids, like protein solutions, can make pipetting hard. You may see bubbles or lose sample volume. You should use reverse pipetting for viscous samples. Aspirate slowly and dispense gently. Low-retention tips help you recover more sample.
- Use reverse pipetting for thick liquids.
- Aspirate and dispense slowly.
- Choose low-retention tips for sticky samples.
When to Replace Pipettes
You should replace your pipette if you see repeated errors, leaks, or broken parts. If calibration fails often, your pipette may be worn out. Track how long your pipette works well. Replace it when it no longer meets accuracy standards.
- Replace pipettes with frequent calibration failures.
- Change pipettes with damaged seals or broken parts.
- Use performance logs to decide when to buy new pipettes.
Callout: You keep your experiments reliable by fixing errors quickly and replacing faulty pipettes.
You improve your experiments when you follow pipetting best practices. Choose the right pipette, use proper technique, and keep your tools clean and calibrated. These steps help you avoid errors and protect your results.
| Practice | Why It Matters |
|---|---|
| Regular Calibration | Prevents errors and ensures precise measurements |
| Routine Cleaning | Stops contamination and keeps experiments accurate |
| Careful Pipette Selection | Reduces sample loss and increases reliability |
- Use the correct angle and speed for each sample.
- Change tips often to prevent cross-contamination.
Keep a daily checklist to make these habits part of your routine. Small changes lead to better science every day.
FAQ
What is the best way to avoid pipetting errors in immunoprecipitation?
You should always calibrate your pipette before use. Use filter tips for sensitive samples. Practice your technique with water first. Keep your workspace clean. Record your results to spot mistakes early.
How often should you calibrate laboratory pipettes?
You should calibrate pipettes every three to six months. If you use pipettes daily or for critical experiments, check them more often. Document each calibration in a logbook for accuracy.
Why do you need to change pipette tips between samples?
Changing tips prevents cross-contamination. Even tiny drops can ruin your results. Use sterile tips for each sample. Store tips in sealed boxes to keep them clean.
What type of pipette tip works best for protein samples?
Low-retention tips work best for protein samples. These tips help you recover more liquid. You avoid sample loss and improve accuracy. Use filter tips for extra protection against contamination.
Can you use the same pipette for DNA, RNA, and protein work?
You should use dedicated pipettes for each type of sample. This practice reduces contamination risk. If you must share pipettes, clean them thoroughly and use filter tips for every sample.