News & Events
The Ultimate Guide to Immunofluorescence Techniques in 2025
Sep

You use immunofl to see where proteins are in cells. Immunofluorescence lets you spot these proteins with bright colors. In 2025, you get sharper images and more details from immunofl than ever before. You can now use immunofl with immunoprecipitation to learn even more about your samples. Many labs rely on immunofl because it gives clear results and helps you solve problems fast. Recent changes in immunofl technology include:
- New fluorophores that show molecular details better
- Better antibody conjugation for higher accuracy
- Multiplexing so you can see many targets at once
- Digital pathology with AI for precise results
- High-plex assays for more data and less error
- Automation to make immunofl easier and faster
If you want a complete icc-if technique guide, you need to know these updates. Immunocytochemistry-immunofluorescence keeps growing, so you get more answers from each experiment.
Key Takeaways
- Immunofluorescence allows you to visualize proteins in cells using fluorescent tags. This technique helps you understand cell structure and function.
- Choose the right antibodies and fluorophores for your experiments. Proper selection ensures clear results and minimizes background noise.
- Multiplex immunofluorescence lets you detect multiple targets in one sample. This method is powerful for studying complex tissues and interactions.
- Automation and AI are transforming immunofluorescence workflows. These technologies increase efficiency and improve data analysis.
- Always include controls in your experiments. Controls help verify results and ensure that your findings are accurate and reliable.
Immunofl Principles
What Is Immunofluorescence
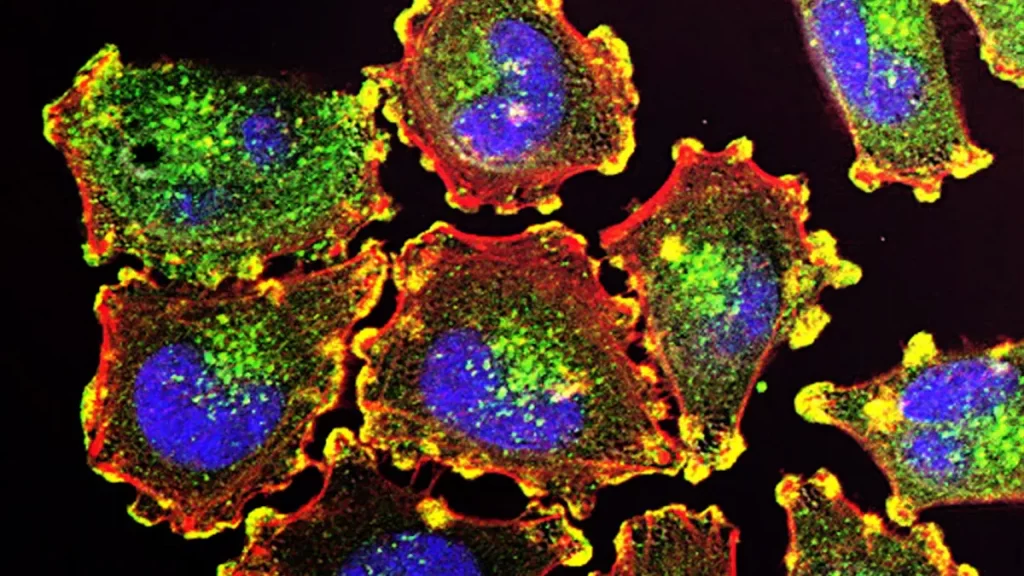
You use immunofluorescence to see where proteins and other molecules are inside cells. This method helps you study the structure and function of cells. Immunofluorescence works by using antibodies that attach to specific targets. These antibodies carry a fluorescent tag. When you shine the right light on your sample, the tag glows. You can then see the location of your target under a microscope. This technique lets you find out not only if a protein is present but also where it sits in the cell.
How It Works
The main idea behind immunofluorescence is the antigen-antibody complex. You start by adding a primary antibody that finds and binds to your target. This target is called an antigen. The binding between the antibody and antigen is very specific. After this, you add a secondary antibody that also binds to the primary antibody. The secondary antibody has a fluorescent label. When you shine light on the sample, the label glows. This glow shows you where the antigen-antibody complex is in your sample.
Tip: The choice of secondary antibody can change your results. Make sure you pick one that binds well and gives a clear signal.
Key Components
You need several things for a successful immunofluorescence experiment:
- A specific primary antibody for your target
- A secondary antibody with a fluorescent tag that binds to the primary antibody
- Proper fixation and permeabilization to keep cell structure and expose antigens for binding
- Controls to check for non-specific binding and confirm your results
| Step | Description |
|---|---|
| Sample Processing | Fix your sample to keep its shape and allow antibody binding. |
| Staining | Block non-specific sites, then add antibodies for specific binding. |
| Imaging | Use a microscope to see where the antigen-antibody complex forms and glows. |
You must check that your antibodies bind only to your target. You also need to optimize conditions for each experiment. Good controls help you spot any non-specific binding. When you follow these steps, you get clear and reliable results from immunofluorescence.
Comprehensive Guide
To Immunofluorescence
You want a comprehensive guide to immunofluorescence that helps you master every step. This guide gives you the tools to plan, run, and analyze your experiments. You start by choosing the right techniques for your research question. You then prepare your samples, select antibodies, and pick the best fluorescence labels. Each step matters. If you skip details, your results may not be clear.
You use immunofluorescence to see proteins, organelles, or other molecules inside cells. You can use these techniques to study disease, cell signaling, or tissue structure. You need to match your method to your goal. Some techniques work best for single targets. Others let you see many targets at once. This comprehensive guide to immunofluorescence covers both basic and advanced approaches. You learn how to avoid common mistakes and get the most from your fluorescence images.
Tip: Always keep a lab notebook. Write down each step and any changes you make. This habit helps you troubleshoot and repeat your experiments.
Direct vs Indirect
You can choose between direct and indirect immunofluorescence techniques. Each method has strengths and weaknesses. In direct immunofluorescence, you use a primary antibody that carries a fluorescent label. This method is simple and fast. You add the antibody, wash, and then look at your sample. You get fewer steps and less background noise. However, direct techniques often give weaker signals. You may miss low-abundance targets.
Indirect immunofluorescence uses two antibodies. The primary antibody binds to your target. The secondary antibody, which carries the fluorescence label, binds to the primary antibody. This method amplifies the signal. You see brighter images and can detect smaller amounts of your target. Indirect techniques also let you use one labeled secondary antibody with many different primary antibodies. This approach saves time and money.
You can compare the two methods using the table below:
| Method | Sensitivity | Species Cross-reactivity |
|---|---|---|
| Direct IF | Weak sensitivity | Low species cross-reactivity |
| Indirect IF | High sensitivity due to amplified signal | Higher species cross-reactivity, can be mitigated with pre-adsorbed antibodies |
You should pick the method that fits your experiment. If you need high sensitivity, indirect immunofluorescence works best. If you want speed and simplicity, direct techniques may be enough.
Multiplex Methods
Multiplex immunofluorescence techniques let you see many targets in one sample. You use different fluorescence labels for each antibody. This approach helps you study complex tissues, like tumors or brain slices. You can track several proteins at once and see how they interact. Multiplex techniques are powerful tools for cancer research, immunology, and neuroscience.
You gain several advantages with multiplex immunofluorescence. You detect multiple biomarkers at the same time. You can map complex expression patterns in tissues. This ability is crucial for understanding diseases and predicting treatment outcomes. You also get a detailed view of tissue structure at the single-cell level.
However, multiplex techniques have some limits. They cost more and take longer to set up. You need special equipment and training. You may face technical problems, such as overlapping fluorescence signals or fading dyes. Antibody cross-reactivity can also cause errors.
The table below shows the main advantages and limitations:
| Advantages of Multiplex Immunofluorescence | Limitations of Multiplex Immunofluorescence |
|---|---|
| Detects multiple biomarkers simultaneously, crucial for understanding complex expression patterns in tissues, especially in cancer immunotherapy. | High costs and time-consuming nature of the method. |
| Enables identification of complex expression patterns necessary for predicting immunotherapy outcomes. | Technical challenges such as spectral crosstalk, antibody cross-reactivity, and fading of fluorescent dyes. |
| Provides insights into tissue microarchitecture and expression at a single-cell level. | Requires special equipment and training for pathologists, limiting clinical use. |
You should weigh these factors before choosing multiplex techniques. If you need to study many targets in one sample, multiplex immunofluorescence gives you the best results. If you only need to see one or two proteins, single-label techniques may be easier and faster.
A comprehensive guide to immunofluorescence always includes advice on choosing the right method. You get better data when you match your technique to your research goal. You can now use these advanced techniques to answer more complex questions than ever before.
Sample Prep
Fixation
You need to fix your samples to keep cells in place and preserve the proteins you want to see. Fixation stops all cell activity and locks proteins where they belong. The fixative you choose affects how well you see your target. Here is a table to help you pick the right fixative:
| Fixative Type | Advantages | Disadvantages |
|---|---|---|
| Formaldehyde/paraformaldehyde | Preserves cell shape well; good for mammalian cells | Can cause autofluorescence; slower for thick samples |
| Glutaraldehyde | Keeps cell structure very well | Causes strong autofluorescence; mostly for EM |
| Methanol | Maintains protein shape; exposes hidden antigens | Denatures proteins; can destroy some targets |
| Methanol/Acetone | Improves labeling; less damaging | Needs careful handling; special conditions needed |
| Microwave fixation | Good for thick tissue samples | May need extra chemical fixatives |
Tip: Start with formaldehyde or paraformaldehyde for most cell types. Try methanol if you need to expose hidden proteins.
Permeabilization
After fixation, you need to let antibodies get inside the cells. Permeabilization opens up the cell membrane. You can use detergents like Triton® X-100 or Tween®-20. Triton® X-100 works well for most samples, but it can make cells lose some proteins if you use too much. Tween®-20 is gentle and sometimes better for certain targets. Saponin and digitonin are other options. Saponin keeps membrane proteins in place and helps keep cell shape. Digitonin only opens the outer membrane, so it is good if you want to keep the inside safe. Always choose the agent that matches your experiment.
Blocking
Blocking helps you avoid unwanted signals. You use blocking agents to cover spots where antibodies might stick by accident. This step gives you clearer images and less background noise. Here are common blocking agents and how to use them:
| Blocking Agent | User Notes |
|---|---|
| Normal serum | Use at 5-10% in PBS-T. Match the serum species to your secondary antibody. |
| BSA | Use at 1-5% in PBS-T. Make sure it is free of IgG to avoid extra signals. |
| Milk Powder | Use at 1% in PBS-T. Do not use for phosphorylated proteins. |
- Other options include fetal calf serum, casein, and gelatin.
Note: Always block before adding antibodies. This step makes your results more reliable.
Antibody Selection
Primary and Secondary
You need to choose the right antibodies for your immunofluorescence experiment. The primary antibody binds directly to the antigen, which is the target molecule of interest. The secondary antibody recognizes the primary antibody and carries a fluorescent label. This setup helps you see where the proteins and antigens are in your sample. You must match the species and isotype of your antibodies to avoid cross-reactivity. The table below shows what you should check when picking antibodies:
| Requirement | Description |
|---|---|
| Species specificity | Pick a secondary antibody that does not react with proteins from your sample species. |
| Isotype matching | Make sure the secondary antibody matches the isotype of your primary antibody. |
| Cross-reactivity | Use primary antibodies from different species and check for unwanted reactions. |
| Validation data | Look for data that proves the antibody binds only to the correct antigen. |
Tip: Always check the datasheet for each antibody. This helps you avoid mistakes and ensures specific binding affinity to your target molecule of interest.
Validation
You must confirm that your antibodies bind only to the right antigens. Validation steps help you prove the specificity of antibodies and avoid false results. Here are ways you can validate your antibodies:
- Use cell lines or tissues that express known levels of your proteins.
- Check if the antibody shows the correct subcellular location for the antigen.
- Test the antibody on tissues where the antigen is present or absent.
- Treat cells with phosphatase to confirm phospho-specific antibodies.
- Use knockout or null cell lines to see if the antibody still binds.
- Apply siRNA or over-express the target protein to test specificity.
- Compare signal-to-noise ratios and check for minimum fold-induction.
- Adjust fixation and permeabilization if needed.
- Test new lots to ensure consistent results.
You get better data when you validate each antibody before using it in your experiment.
Controls
Controls help you trust your results. You need several types of controls to check for non-specific binding and confirm that your antibodies detect only the correct proteins and antigens. Here is a list of essential controls:
- Positive Control: Shows that your antibody can find and bind to the target protein.
- Omitting Primary Antibody Control: Reveals if the secondary antibody binds non-specifically to antigens.
- Absorption Control: Uses immune-depleted antibody to prove specificity; no signal should appear.
- Isotype Control: Checks for non-specific interactions of the primary antibody with antigens.
- Omitting Secondary Antibody Control: Helps you see if autofluorescence causes any signal.
You should always include these controls in your experiment. They help you spot problems and make sure your results are accurate.
Detection
Fluorophores
You need to choose the right fluorophores for successful detection and visualization of antigens in immunofluorescence. Fluorophores are molecules that glow when exposed to specific wavelengths of light. You use them to label antibodies and make proteins visible under a fluorescence microscope. The most widely used fluorophores include fluorescein and rhodamine. These fluorophores work well for dual labeling in both widefield and confocal fluorescence microscopy. Fluorescein gets excited at 470 nm for widefield and 488 nm for confocal. Rhodamine peaks at 550 nm for widefield and 543 nm or 561 nm for confocal.
You can improve detection by picking fluorophores with narrow emission spectra. This choice helps you avoid spectral overlap and bleed-through, especially in multi-color experiments. Quantum dot conjugates are ideal for multi-color fluorescence imaging because they absorb a broad range of light and emit in narrow bands. You should always check the emission and excitation spectra before starting your experiment. Specialized filter sets, such as FITC for fluorescein and TRITC for rhodamine, help you get clear signals.
- Fluorophores can be modified to boost brightness and photostability.
- Use fluorophores with narrow emission spectra for multiplex detection.
- Quantum dots work well for multi-color visualization.
- Always use a spectrum viewer to check for possible bleed-through.
Tip: Pick fluorophores with minimal spectral overlap. This step makes your detection and visualization more accurate.
Signal Amplification
Sometimes you need to amplify the fluorescent signal to see low-abundance proteins. Signal amplification techniques help you get stronger detection and clearer visualization. You can use several methods to boost fluorescence in immunofluorescence experiments. The table below shows common amplification techniques and their features:
| Technique | Description |
|---|---|
| Tyramide Signal Amplification (TSA) | You label target proteins with HRP-conjugated antibodies. These antibodies deposit fluorophore-labeled tyramides, which amplify the fluorescence signal. |
| Avidin–Biotin Complex (ABC) | You use the strong binding between avidin and biotin to enhance detection. This method increases the fluorescent signal. |
| Oligonucleotide-based techniques | You use oligonucleotides for signal amplification. This approach allows highly multiplexed detection and visualization. |
| FRACTAL | You amplify multiple signals at once by cyclic staining of target molecules. This new method boosts detection in complex samples. |
You should select the amplification method that fits your experiment. TSA works well for sensitive protein detection. ABC is reliable for routine fluorescence microscopy. Oligonucleotide-based techniques and FRACTAL are best for advanced multiplex fluorescence imaging.
Note: Amplification can increase background noise. You should optimize blocking and washing steps to keep your detection specific.
Imaging
You need the right imaging platform to capture and analyze fluorescent signals. Modern fluorescence microscopy systems offer high sensitivity and advanced features for detection and visualization. You can use widefield, confocal, or automated imaging systems for your experiments. The table below lists popular imaging platforms and their features:
| Imaging Platform | Features |
|---|---|
| ImageXpress® HCI.ai High-Content Screening System (Molecular Devices) | AgileOptix™ technology, multiple imaging modes, high-intensity laser light source, automated water immersion objective lenses, Deep Tissue Confocal Disk |
| ImageXpress® Pico Automated Cell Imaging System (Molecular Devices) | High-resolution imaging, 2.5X – 63X magnification, Z-stacking, user-friendly software |
| CellInsight™ High-Content Screening Platforms (Thermo Fisher Scientific) | Up to 7-color detection, high-speed image acquisition, powerful image processing algorithms |
| EVOS Cell Imaging Systems (Thermo Fisher Scientific) | Self-installation, two-color fluorescence, spectral unmixing software for multiplex immunofluorescence |
You can use these platforms for routine detection and advanced fluorescence imaging. High-content screening systems let you analyze many samples quickly. Confocal fluorescence microscopy gives you sharp images and reduces background. Automated systems help you get consistent results and save time.
Tip: Adjust exposure time and laser intensity to reduce background and improve detection. Use spectral unmixing software for multiplex visualization.
You can optimize detection by choosing the right fluorophores, using signal amplification, and selecting the best imaging platform. You get clearer visualization and more reliable results in immunofluorescence experiments. Always test your settings and controls before starting large-scale protein detection studies.
Protocol
Workflow
You can follow a clear workflow to get the best results from immunofluorescence. Each step builds on the last, so you need to work in order. Here is a standard workflow you can use:
- Plan your experiment and prepare your samples. Decide what you want to see and choose the right controls.
- Fix your samples to keep the cells and proteins in place.
- Permeabilize the cells so antibodies can reach their targets.
- Block non-specific sites to reduce background signals.
- Incubate with the primary antibody that binds to your target protein.
- Add the secondary antibody with the fluorescent label.
- Acquire images using a fluorescence microscope.
Tip: Write down each step in your lab notebook. This habit helps you repeat your experiment and spot any problems.
Timing
You need to manage your time well during immunofluorescence. Each step takes a different amount of time. Planning helps you avoid rushing or missing steps.
- Sample preparation and fixation: 30–60 minutes
- Permeabilization: 10–20 minutes
- Blocking: 30–60 minutes
- Primary antibody incubation: 1 hour at room temperature or overnight at 4°C
- Secondary antibody incubation: 30–60 minutes
- Washing steps: 5–10 minutes each, repeated several times
- Imaging: 10–30 minutes per sample
You can save time by preparing reagents and labeling tubes before you start. If you incubate overnight, you can split the work over two days.
Pitfalls
You may face some common problems during immunofluorescence. Knowing these pitfalls helps you avoid mistakes and get clear results.
-
Non-specific staining can happen if antibodies bind to the wrong proteins. Lower the antibody concentration or use antibodies that match your sample species.
-
High background staining often comes from non-specific binding or autofluorescence. Use the right blocking serum and always include controls.
-
Insufficient washing leaves extra antibodies in your sample. Wash thoroughly with physiological solutions after each step.
-
Titrate your primary antibody to find the best concentration.
-
Store fluorescent reagents in the dark and at the right temperature.
-
Always include positive and negative controls to check your results.
Note: Careful planning and attention to detail help you avoid most problems in immunofluorescence.
Troubleshooting
Low Signal
You may notice weak or missing signals in your immunofluorescence images. This problem can make it hard to see your target protein. Many factors can cause low signal. You can use the table below to find common causes and solutions:
| Cause of Low Signal | Recommended Troubleshooting Steps |
|---|---|
| Antibody conditions not optimized | Titrate antibody concentration; incubate at room temperature or overnight at 4°C. |
| Protein of interest is low expressed | Use signal amplification; pair with a brighter fluorophore. |
| Damaged epitope | Reduce fixation time or change to another fixative. |
| Incubation time too short | Increase the incubation time. |
| Sample dried out | Always keep the sample moist. |
| Overfixation | Reduce fixation time or change the fixative. |
| Inadequate permeabilization | Optimize or skip the permeabilization step. |
| No binding of primary antibody | Use a proven primary antibody; check with a positive control. |
| Very low or no antigen expression | Use a positive control; reconsider the experimental system. |
Tip: Always include a positive control to confirm your protocol works.
High Background
High background can make your images hard to interpret. You may see unwanted fluorescence that hides your real signal. Several factors can cause this issue:
- Endogenous autofluorescence from aging pigments or sample preparation.
- Oversaturation of the target with too much primary antibody.
- Cross-reactivity of the primary antibody with other tissue proteins.
- Non-specific binding of the secondary antibody to tissue immunoglobulins.
You can reduce background by:
- Titrating antibody concentrations for specific staining.
- Using blocking agents like BSA or normal serum.
- Applying a blocking solution before antibody incubation.
- Ensuring blocking proteins do not come from the same species as your primary antibody.
- Using photobleaching with white phosphor LED arrays to lower autofluorescence.
- Running deletion controls to check for non-specific binding.
Non-Specific Binding
Non-specific binding can cause false signals in your experiment. You want to make sure antibodies bind only to your target. Try these strategies:
- Use a blocking solution before antibody incubation. Serum from the same species as your secondary antibody works best.
- Add 5% BSA as a general protein blocker.
- Use diluent buffers with low ionic strength.
- Add non-ionic detergents like Tween 20 or Triton X to your buffer.
- Co-incubate primary antibodies with thiophilic reagents such as reduced glutathione or L-cysteine.
Note: Careful blocking and buffer selection help you get clear, specific results every time.
Immunoprecipitation
Integration
You can combine immunoprecipitation with immunofluorescence to get more information from your samples. Immunoprecipitation lets you pull out specific proteins or protein complexes from a mixture. When you use immunoprecipitation, you can isolate your target and then use immunofluorescence to see where it is in the cell. This integration gives you both the location and the identity of your proteins. You can use immunoprecipitation to study how proteins interact, how they change in disease, or how they move inside cells. Many labs now use immunoprecipitation with immunofluorescence to answer complex questions about cell biology. You get a powerful tool when you use both methods together.
Applications
Immunoprecipitation has many applications in research. You can use it to study proteins, protein complexes, and even protein-DNA interactions. The table below shows some common applications and what you can learn from each one:
| Application Type | Description |
|---|---|
| Targeted Protein Purification | Used to isolate specific proteins from complex mixtures. |
| Protein Concentration | Increases the concentration of proteins for further analysis. |
| Analysis of Protein-Protein Interactions | Helps in studying interactions between different proteins. |
| Identification/Analysis of Protein Complexes | Enables the study of complexes formed by multiple proteins. |
| Analysis of Protein/DNA Interactions | Utilizes chromatin IP (ChIP) to study interactions between proteins and DNA. |
You can use immunoprecipitation for each application to answer different research questions. For example, you might use immunoprecipitation to pull down a protein complex and then use immunofluorescence to see where the complex forms in the cell. This approach helps you understand how proteins work together. You can also use immunoprecipitation to study how proteins bind to DNA, which is important for gene regulation. Each application gives you a new way to look at your samples.
Tip: Always match your immunoprecipitation application to your research goal. This step helps you get clear and useful results.
Case Studies
Researchers have used immunoprecipitation and immunofluorescence together in many successful studies. In one study, scientists combined immunofluorescence with DNA FISH to explore 3D nuclear organization. This method let them analyze nuclear proteins and compartments in different cell types. Another study used immunoprecipitation and immunofluorescence to identify neural autoantigens. The researchers found over 20 different target antigens by using indirect immunofluorescence on neural tissue. These case studies show that you can use immunoprecipitation with immunofluorescence to answer complex questions about proteins, their locations, and their interactions. You can apply these methods to many types of cells and tissues.
Future Trends
Automation
You now see automation changing how you work with immunofluorescence. Automated microscopes, robotized slide trays, and high-sensitivity video cameras help you prepare slides and capture images faster. These tools let you process more samples and collect more data in less time. Digitalization of fluoroscopic images means you can store and review data easily. Standardized pattern classification reduces mistakes and helps you compare analysis results across experiments. You notice fewer false results and less variability in your data. Automation increases laboratory throughput and makes your workflow more efficient. You can focus on analysis instead of manual tasks. This shift lets you spend more time on data interpretation and less on repetitive work.
Tip: Automated systems help you keep your data organized and ready for analysis at any time.
New Probes
You have access to new fluorescent probes that improve your experiments. These probes give you better sensitivity and clearer data. Some of the latest probes include:
- gGlu-HMRG: This probe becomes fluorescent when it meets a specific enzyme in the cell. It moves through cell membranes and collects in lysosomes. You get strong signals and low background, which makes your analysis easier.
- OTL-38: This probe targets folate receptor α. It gives you a high signal-to-background ratio. Clinical trials show at least 85% sensitivity for tumor detection. You can trust the data from this probe for accurate analysis.
These new probes help you see more details in your samples. You can collect more data and improve your analysis of protein locations and interactions.
AI Analysis
Artificial intelligence now plays a big role in your analysis of immunofluorescence images. AI tools help you classify patterns and spot artifacts in your data. For example, QUALIFAI is a deep-learning tool that automates artifact identification. It reaches over 90% accuracy in classifying common artifacts. You can trust the analysis results and spend less time checking for errors. AI helps you process large amounts of data quickly. You can use AI to analyze anti-nuclear antibody patterns and other complex data sets. This technology improves the reliability of your analysis and helps you make better decisions based on your data.
Note: AI analysis tools let you handle more data and get consistent results, even with large or complex experiments.
You can achieve reliable results in immunofluorescence by following key steps. Adapt your protocol to your lab’s needs and use methods like enhanced avidin-biotin labeling, enzyme digestion, or microwave treatment for better antigen exposure. Reduce background and amplify signals by adjusting antibody use. Stay current with immunofluorescence advancements by exploring:
- Blogs, webinars, and publications
- Upcoming events and podcasts
Keep troubleshooting and optimizing your workflow for the best outcomes.
FAQ
What is the difference between immunofluorescence and immunohistochemistry?
You use immunofluorescence to detect proteins with fluorescent dyes. Immunohistochemistry uses enzymes that create colored products. Immunofluorescence gives you sharper images and lets you see multiple targets at once. Immunohistochemistry works well for routine tissue analysis.
How do you reduce background noise in immunofluorescence?
You block non-specific sites with serum or BSA. You wash samples thoroughly after each step. You use the right antibody concentration. You select fluorophores with minimal overlap. You always include controls to check for unwanted signals.
Can you use immunofluorescence on live cells?
You can use immunofluorescence on live cells with special dyes and antibodies. You avoid harsh fixation and permeabilization. You use cell-permeable probes like Calcein-AM. Live-cell imaging helps you study dynamic processes in real time.
What controls should you include in your experiment?
You include positive controls to confirm antibody binding. You use negative controls by omitting primary or secondary antibodies. You add isotype controls to check for non-specific interactions. You always compare results with known standards.
How do you choose the best fluorophore for your experiment?
You select fluorophores based on their brightness and stability. You match excitation and emission spectra to your microscope filters. You avoid spectral overlap in multiplex experiments. You check manufacturer data for compatibility with your imaging system.