News & Events
Maximize Immunoprecipitation Accuracy with the Right Micropipette Pipette

Precision shapes every step of immunoprecipitation. You need the right micropipette pipette to measure reagents and achieve strong results. The micropipette stands out as one of the indispensable tools in scientific research. Your technique can boost performance or cause errors. When you choose a pipette that fits your hand and sample, you set up reliable experiments. Take a moment to check your habits and see if you can improve your accuracy.
Key Takeaways
- Choose the right micropipette for your sample volume. Using a pipette that matches your sample size improves accuracy and reduces errors.
- Practice good pipetting techniques. Keep the pipette vertical, immerse the tip correctly, and move the plunger slowly to avoid bubbles and contamination.
- Regularly calibrate your pipette. A consistent calibration schedule ensures accurate measurements and reliable results in your experiments.
- Select high-quality pipette tips. Using compatible and well-fitting tips minimizes leaks and contamination, leading to better sample recovery.
- Maintain a clean workspace. Controlling environmental factors like temperature and humidity helps prevent measurement errors and keeps your results consistent.
Importance of Precision
Accuracy in Immunoprecipitation
You need precision to get strong results in immunoprecipitation. When you measure liquids, small mistakes can change your results. You want to ensure accuracy and precision every time you use a micropipette. If you use the right pipette and follow good technique, you help your experiment succeed. Achieving accuracy and precision means you get the right amount of sample and reagent. This helps you avoid contamination and sample carryover. You can trust your results when you pay attention to every step.
Tip: Always check your pipette settings before you start. This simple habit helps you avoid errors and keeps your experiment on track.
Common Pipetting Errors
Many errors happen when you use a micropipette. You might set the wrong volume or use a tip that does not fit well. Sometimes, you press the plunger too fast or dip the tip too deep. These mistakes can cause sample carryover or prevent PCR contamination. You may see bubbles in your sample or lose liquid. If you do not use the right technique, you risk contamination and poor results.
Here is a quick table to help you spot common pipetting errors:
| Error Type | What Happens | How to Fix |
|---|---|---|
| Wrong volume set | Too much or too little | Double-check settings |
| Poor tip fit | Leaks or loss of sample | Use compatible tips |
| Fast plunger action | Bubbles or splashes | Press slowly and evenly |
| Deep tip immersion | Sample carryover | Keep tip just below surface |
You can prevent errors by practicing good habits and checking your tools. You improve your accuracy and precision when you stay alert and careful.
Micropipette Pipette Selection

Choosing the right micropipette pipette is a key step for strong results in immunoprecipitation. You need to match your pipette to your sample and task. This helps you reach the highest accuracy and precision.
Volume Range
You should always match the pipette’s volume range to the amount you want to measure. Each pipette works best within a certain range. If you use a pipette that is too large for a small sample, you risk losing accuracy. For example, if you need to measure 20 microliters, pick a pipette with a range of 2–20 microliters, not one that goes up to 200 microliters. The smallest suitable pipette gives you the best control and helps you avoid mistakes.
Tip: Always choose the smallest pipette that can handle your sample volume. This simple step improves your results.
You can see the difference in accuracy in the table below:
| Sample Volume | Best Pipette Range | Accuracy Level |
|---|---|---|
| 1 µL | 0.5–10 µL | High |
| 20 µL | 2–20 µL | High |
| 100 µL | 20–200 µL | High |
| 500 µL | 100–1000 µL | High |
Ergonomics
You will spend a lot of time using your micropipette. Comfort matters. Modern micropipettes have lightweight bodies and soft grips. These features help your hand stay relaxed. Adjustable plunger forces make it easier to press and release the pipette. These designs lower your risk of hand strain and help you avoid mistakes. When you feel comfortable, you can work longer and keep your accuracy high.
Note: Ergonomic pipettes do more than protect your hands. They also help you avoid errors that come from fatigue.
Calibration
You need to check your pipette’s calibration often. Regular calibration keeps your pipette accurate. Over time, pipettes can drift from their set values. This can lead to wrong measurements. You should follow a schedule for calibration and keep records of each check. Many labs send their pipettes for certification once or twice a year. You can also check calibration in your lab with simple tests.
Some pipettes use air displacement. Others use positive displacement. Air displacement pipettes work well for most water-based samples. Positive displacement pipettes are better for thick or sticky liquids. You should pick the right type for your sample to keep your results accurate.
Callout: Always check your pipette’s calibration before starting a new set of experiments. This habit helps you trust your results.
Pipette Tips
Fit and Compatibility
You need to choose the right pipette tips for your experiment. High quality pipette tips help you get accurate results, especially when you work with small or thick samples. When you use pipette specific tips, you lower the risk of leaks and sample loss. You also protect your experiment from contamination. High-quality tips fit your pipette well and make your work easier.
- The fit and compatibility of pipette tips are essential for accurate results, especially with small volumes of viscous liquids.
- Using recommended pipettors and tips minimizes variability and contamination risks during immunoprecipitation.
- BrandTech pipette tips are noted for their accuracy, which is critical in preventing contamination and ensuring sample recovery.
If you want to avoid problems, always choose the right pipette tips for your pipette model. Poorly fitting tips can cause leaks or even ruin your experiment. You can trust high-quality tips to give you the best performance.
Tip: Always check that your tips fit snugly before you start pipetting. A good fit keeps your results reliable.
Filtered and Low Retention
You should know when to use filtered or low retention tips. Filtered tips help block aerosols and protect your samples from contamination. Low retention tips work best when you handle sticky or precious samples. These tips make sure you recover as much liquid as possible.
- Use low retention pipette tips during the preparation of solutions for the SignalStar Multiplex Immunohistochemistry Assay.
- This ensures accuracy in pipetting and helps avoid the generation of bubbles.
Low retention tips stop liquid from sticking to the inside of the tip. You get more of your sample back, which is important for small or expensive reagents. If you work with proteins or viscous liquids, low retention tips give you better accuracy. You also avoid bubbles, which can affect your results.
You should always choose the right pipette tips for your task. High quality pipette tips and low retention tips help you get the best results in immunoprecipitation.
Pipetting Technique

Consistent Angle and Depth
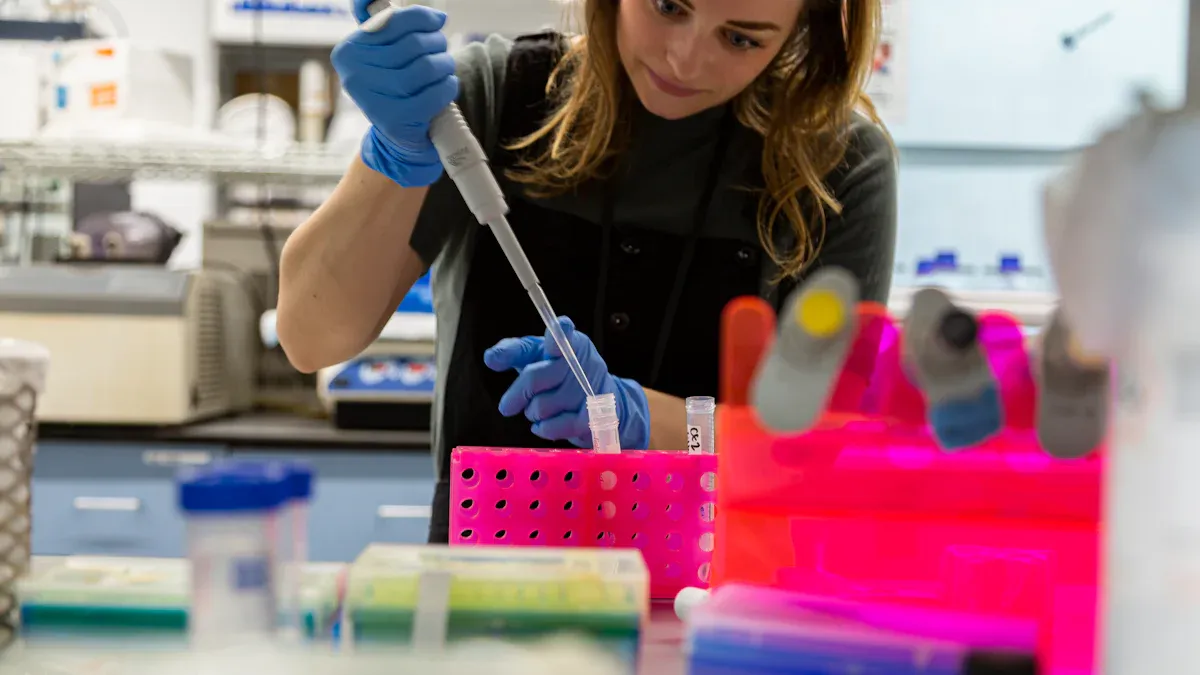
You need to keep your pipette vertical when you draw or dispense liquids. Holding the pipette at a steady angle helps you avoid sample carryover and keeps your measurements accurate. You should immerse the tip just below the surface of the liquid. If you dip the tip too deep, you risk drawing up extra fluid or causing contamination. If you keep the tip too shallow, you may pull in air and create bubbles.
- Hold the pipette straight up and down.
- Immerse the tip 2–3 millimeters below the liquid surface.
- Release the plunger slowly to draw up the sample.
Tip: Always check the angle and depth before you start pipetting. This habit helps you ensure accuracy and precision in every step.
Pre-Wetting and Bubble Avoidance
Pre-wetting the pipette tip helps you get consistent performance. You should aspirate and dispense the liquid once or twice before you measure your final volume. This step coats the inside of the tip and reduces errors from liquid sticking to the walls. Pre-wetting also helps you avoid bubbles, which can change your results.
If you pipette too fast, you may create bubbles or lose sample. Mixing at a fast speed can lead to a significant loss of antibodies, with a 32% reduction in yield compared to slow washing. Medium-speed washing causes a 4% loss of conjugated antibodies. You should move the plunger slowly and steadily. This technique helps you keep your results reliable and reproducible.
- Pre-wet the tip by aspirating and dispensing the liquid two times.
- Move the plunger slowly to avoid bubbles.
- Watch for bubbles in the tip and discard any sample with bubbles.
Note: You can choose the right pipette tips to help prevent bubbles and sample loss. High quality pipette tips and pipette specific tips give you better control.
Minimizing Hand Strain
You spend a lot of time using your micropipette pipette. You need to protect your hands to keep your technique strong. Hand strain can lead to errors and lower your performance. You should use ergonomic pipettes with soft grips and adjustable plungers. Take breaks during long pipetting sessions. Stretch your fingers and wrists to keep them relaxed.
- Use pipettes with comfortable grips.
- Adjust the plunger force to a level that feels easy.
- Take short breaks and stretch your hands.
Tip: You can maintain consistent performance by caring for your hands. Good technique and regular breaks help you avoid fatigue and keep your results accurate.
You should always follow proper pipetting technique. This practice helps you ensure accuracy and precision in immunoprecipitation. You can choose the right pipette tips and use the best micropipette for your sample. These steps help you avoid contamination and sample carryover. You get reliable results when you pay attention to every detail.
Maintenance and Environment
Cleaning
You need to keep your pipette clean to protect your samples from contamination. Wipe the outside of your pipette with a lint-free cloth and a mild cleaning solution. Clean the shaft and tip cone regularly, especially after handling sticky or hazardous samples. If you see any residue, remove the tip and clean the area right away. You can also autoclave parts of your pipette if the manufacturer allows it. This step helps you stop contamination before it starts.
Tip: Always wear gloves when cleaning your pipette. This habit keeps both you and your samples safe.
Calibration Schedule
Regular calibration keeps your pipette working at its best. You should follow a set schedule for calibration. Many labs check their pipettes every six months, but you may need to do it more often if you use them daily. Mark your calendar and keep a record of each calibration. This routine helps you catch problems early and maintain accuracy. If you notice your pipette giving odd results, send it for calibration right away.
Here is a simple checklist for pipette calibration:
- Check the volume setting before each use.
- Test the pipette with water to see if it measures correctly.
- Record the date and result of each calibration.
- Send the pipette for professional calibration as needed.
Environmental Factors
You need to control your lab environment to get reliable results. Changes in temperature and humidity can affect how your pipette works. If your lab gets too warm or too humid, your measurements may change. This can lower the accuracy of your immunoprecipitation results. Keep your workspace at a steady temperature and humidity level. Use air conditioning or dehumidifiers if needed. Consistent conditions help you avoid errors and keep your results reproducible.
Note: Even small changes in your lab environment can lead to contamination or inaccurate measurements. Always monitor your workspace for the best results.
You can maximize immunoprecipitation accuracy by choosing the right micropipette pipette and using proper technique. Pay close attention to every pipette step, from selecting the correct volume range to keeping your pipette clean. Consistent habits help you avoid errors and protect your samples. Try using a daily checklist to keep your pipette work reliable:
- Keep plates on ice while loading antibody beads.
- Re-mix beads by pipetting up and down before each step.
- Inspect wells for equal aliquots of antibody beads.
- Clean pipette surfaces with 70% ethanol.
- Use adjustable spacer pipettes for sample transfer.
Tip: Careful pipette maintenance and technique lead to strong, reproducible results.
FAQ
What is the best way to check if my pipette is accurate?
You can test your pipette by dispensing water onto a balance. One microliter of water weighs about one milligram. If the weight matches your setting, your pipette works well.
How often should I calibrate my micropipette pipette?
You should calibrate your pipette every six months. If you use it daily, check it more often. Regular calibration helps you keep your results accurate.
Why do I need filtered pipette tips for immunoprecipitation?
Filtered tips block aerosols and prevent contamination. You protect your samples from unwanted particles. This step helps you get reliable results in immunoprecipitation.
Can I use the same pipette for different sample types?
You should use separate pipettes for sticky or hazardous samples. Switching pipettes helps you avoid cross-contamination. Clean your pipette after each use to keep your samples safe.
What should I do if I see bubbles in my sample?
If you see bubbles, discard the sample and try again. Move the plunger slowly and keep the tip just below the liquid surface. This technique helps you avoid bubbles and get accurate measurements.

